With the source/playback device prepared (tape, MD, CD, reel, etc), do the following steps:
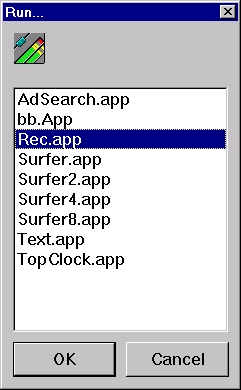
1. To open the Record application, left click on Global in the
menu bar at the top of the screen, and select Run Application...
2. Choose the Recorder application by clicking on Rec.app and clicking OK.
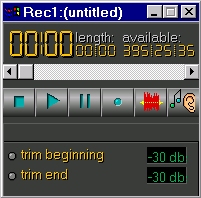
3. The Recorder application will appear. To check levels, click on the
Record button ![]() ,
and start your playback source.
,
and start your playback source.
4. Open the volume controls by clicking on the brown speaker in the
system tray which is in the lower right corner of your windows task bar.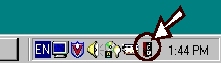
5. Observe the volume control meters with the audio playback. Make sure
the meters are reaching maximum level just reaching the red area of the
meter.
6. Once the desired levels are set, rewind/prepare your playback source
to the beginning, and you are ready to record (record button is still in),
click on the Play button ![]() to begin recording.
to begin recording.
7. As in the rest of the applications in Dalet, when you begin recording a titling window will appear. In the "title" field enter the title of the recording.
8. Select the appropriate storage category in the category window.
9. Click the Set button to set the category for the recording.
10. Click the OK button to store the recording in the set category.
DONT FORGET!! Completing and Saving The Recording
After you click the stop button to end the recording, you must then save the current recording channel:
1. Make sure the Recorder application is active (title bar of the Recorder application is blue or 'active' color).
2. From the drop down menu bar, click on Current Channel and then Save.